Synology and Proton? Nucular!
How to sync your Synology NAS with Proton Drive using Rclone

When it comes to really sensitive data, I only trust myself, so I just pile them up on my Synology NAS.
Not a big deal: it’s a refurbished DS214 with 2x4TB drives in RAID1, so at least I am able to sleep at night knowing that “two simultaneous drive failures” are unlikely to happen.
On the other hand, Proton Drive is my personal choice for not-so-sensitive data. You know, those files that you want to share, but really care if any third parties could have access to.
Obviously, my NAS is not exposed to the internet, so I can access it only on my network. So how can I get the best of both worlds?
The missing part
Folks at Proton have nice Drive apps for Android, iOS, Windows and MacOS but it seems that the Synology compatibility was left in the back burner long ago.
You can always use the native app and copy files manually. But what if you could automate the process of syncing files between your Synology NAS and Proton Drive?
Rclone to the rescue
Rclone is a command line program to manage files on many cloud storage solutions. And I mean many. But I never thought that Proton Drive would be one of them due to its focus on security and privacy.
As it turns out, Proton Drive is supported by Rclone, as it is based on the Go API provided by Proton. This means that you can use Rclone to sync files.
Technically speaking, this is a workaround, as Rclone will not sync changes in real time. But as long as Nuclear is not yet available, the Nucular approach is!
Let’s get started
First of all you must enable SSH access on your Synology NAS.
Danger Zone
While enabling SSH access is generally safe and supported, it does expose your NAS to potential security risks if not properly secured. Or even worse, you may break something.
Log in into your Synology through the web interface, and then navigate to Control Panel → Terminal & SNMP → Terminal.
Tick Enable SSH service, and choose a port (22, duh)1.
Once connected to you NAS via SSH you must obtain root access:
1
2
3
dmbuil@mynas:/$ sudo -i
Password:
root@mynas:~#
Tip
I always try to use keys when SSHing to anywhere, but not for my Synology NAS. To overme this, You can use the SSH option-o IdentityAgent=noneto keep your SSH agent from trying to use your public key for authentication.
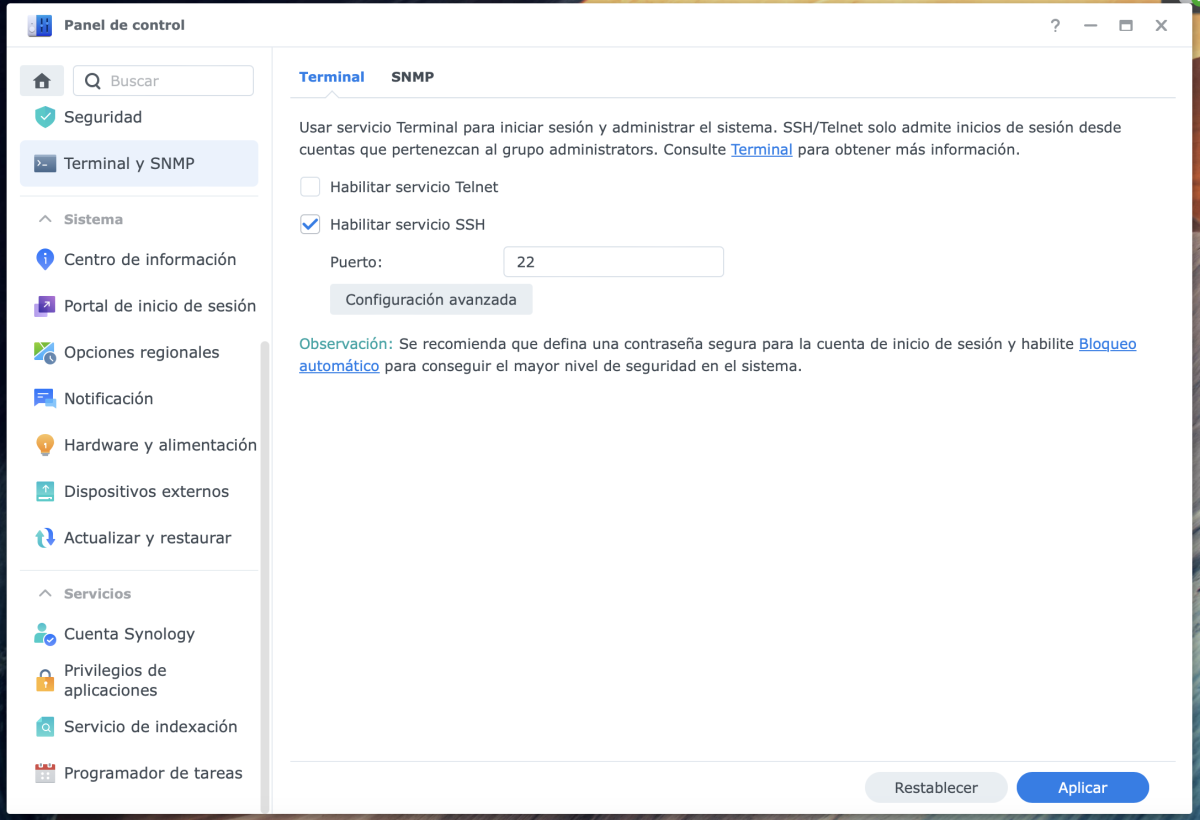 Enable SSH service
From there you will need to download the Rclone install script, set permissions, and then install it.
1
2
3
wget https://rclone.org/install.sh
chmod +x install.sh
./install.sh
Note
The installer won’t be able to install man pages, throwing the following error:
mandb not found. The rclone man docs will not be installed.
Do not panic: it will work fine anyway, I promise.
The initial setup involves getting the Auth Token from Proton. I originally configured Rclone’s Proton Drive support on my mac, but you can do it straight from your Synology NAS as well.
1
rclone config
You will be prompted to create a new remote, so type n and hit Enter.
Then you will be asked to choose the storage type, type the number or just protondrive for Proton Drive.
1
2
3
4
5
6
7
8
9
10
11
12
13
14
15
16
17
18
19
No remotes found, make a new one?
n) New remote
s) Set configuration password
q) Quit config
n/s/q> n
name> protondrive
Option Storage.
Type of storage to configure.
Choose a number from below, or type in your own value.
 1 / 1Fichier
   \ "fichier"
 2 / Akamai NetStorage
   \ "netstorage"
 3 / Alias for an existing remote
   \ (alias)
 # ...Many more here...#
42 / Proton Drive
   \ "protondrive"
Storage> 42
Most probably the config has been created in /root/.config/rclone/rclone.conf, but you can check it with the command:
1
rclone config file
The editor installed in the terminal is VI (tense creepy background music…). VI it’s a powerful editor, but love it or hate it. Swallow your tears and man up.
You can view the config file with the command:
1
vi .config/rclone/rclone.conf
The content of the file should will have a section like this:
1
2
3
4
5
6
7
8
9
[protondrive]
type = protondrive
username = mycoooluser@proton.me
password = 3-xxxxxxxxxxxxxxxxxxxxxxxxxxxxxxx
2fa = 123456
client_uid = xxxxxxxxxxxxxxxxxxxxxxxxxxxxxxx
client_access_token = xxxxxxxxxxxxxxxxxxxxxxxxxxxxxxx
client_refresh_token = xxxxxxxxxxxxxxxxxxxxxxxxxxxxxxx
client_salted_key_pass = xxxxxxxxxxxxxxxxxxxxxxxxxxxxxxx==
Important
If you update your system, you’ll need to install again rclone, so having the config in a location that will be not overwritten will avoid all the configuration hassle. Or at least, make sure to copy the config file to a safe place.
Rclone is configured 🎉, so now try the following command:
1
rclone lsd protondrive:
You shoud see all the folders created in you Proton Drive storage root. Or, if you really like to watch scrolling text on a terminal:
1
rclone ls protondrive:
Rclone2 will list all the files you have in Protron Drive.
The copy
For the fun syncing part, I will give only a quick examples, since there is plenty of documentation on this. Let’s say you want to mirror some or all NAS data into PD: your command is rclone sync. This command makes source and dest identical, modifying destination only.
From the command synopsis:
Sync the source to the destination, changing the destination only. Doesn’t transfer files that are identical on source and destination, testing by size and modification time or MD5SUM. Destination is updated to match source, including deleting files if necessary (except duplicate objects, see below).
Note that files in the destination won’t be deleted if there are any errors at any point. Duplicate objects (files with the same name, on those providers that support it) are also not yet handled.`
Important Rclone is prone to can cause data loss if used recklessly. Always test first with the
--dry-runor the--interactive/-iflag:
You want to mirror ALL the content of the folder DATA that’s in your NAS into Proton Drive.
Find in your NAS the location of the source folder, it should be in /PATH/TO/NAME_OF_YOUR_VOLUME. Take a look under Storage manager or give a simple:
1
ls /
And check the volume name. Let’s say it’s /volume1/share/DATA, to sync you shall launch:
1
rclone --config="/var/rclone.conf" sync /volume1/share/DATA protondrive:DATA/
Tip
Synology NAS creates hidden subfolders with the name@eaDirin every folder, You can exclude them from the sync with the--excludeflag:
This can also apply to other hidden folders that you may have, such as macOS’
.DS_Store.
Last but not least, we must set up a scheduled job to run the Rclone command.
- Log in to the Synology NAS.
- Navigate to DSM Control Panel → Task Scheduler.
- Next click on the create button and then click on Scheduled Task → User-defined script.
- Then, in the create task window, enter your task name in the general settings tab.
- Next, in the schedule tab, choose the schedule.
- Finally, on the task setting tab, paste your user-defined script.
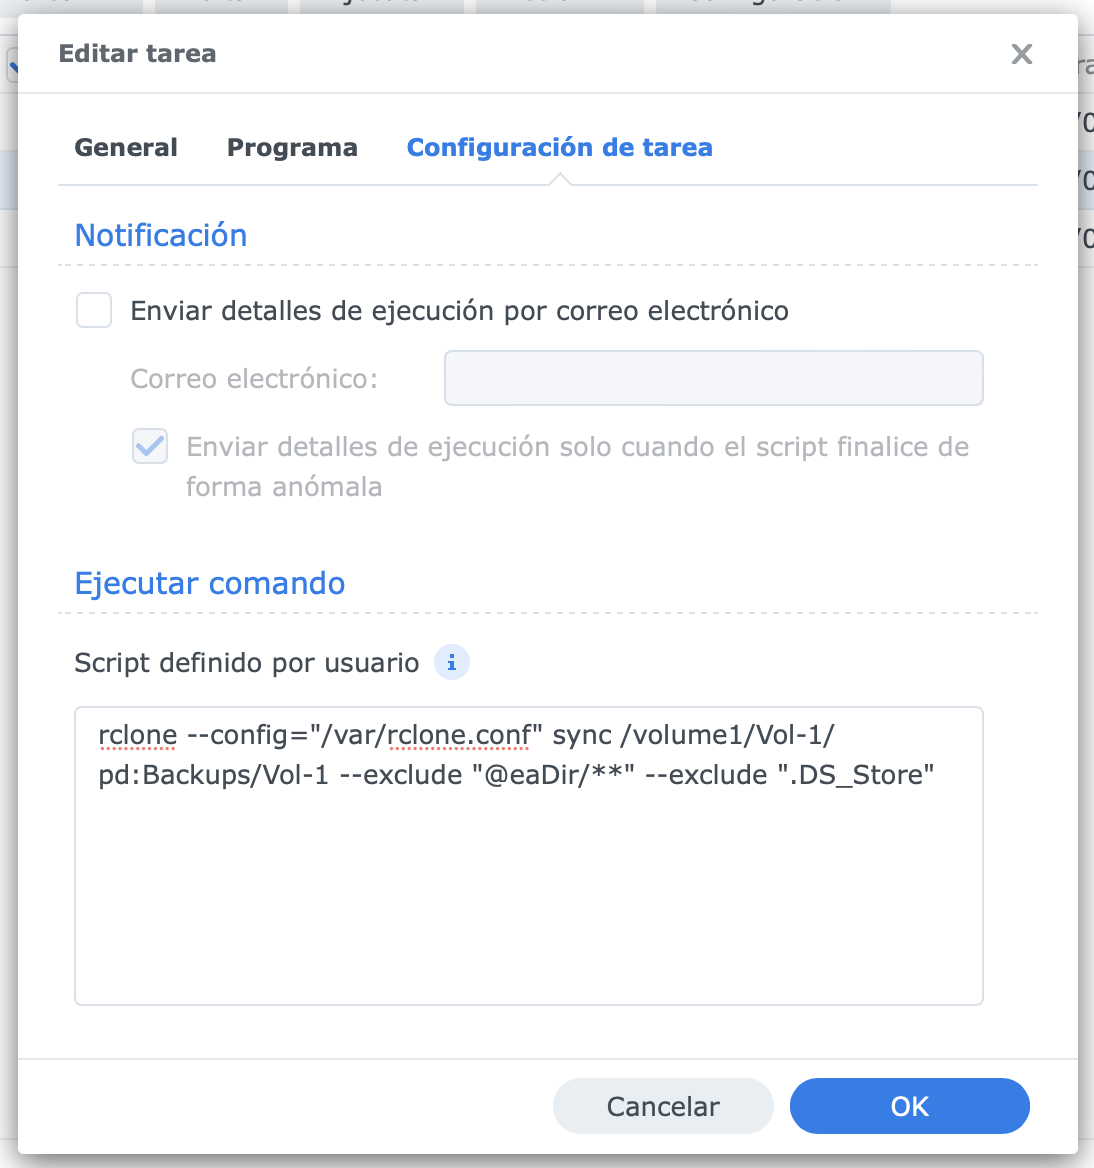 Command to run by the Scheduled Task
Click Ok to save the task.
Don’t forget to disable the SSH service once you are done1.
Hope it helps!
And by “duh” I mean that you should only use the default port 22 as SSH will be disabled later on: it is a well-known port and may be targeted by attackers even in your local network. ↩︎ ↩︎2
If you are not familiar with Rclone, I recommend reading the Rclone documentation to learn more about its features and capabilities, or if you just want the list of available commands. ↩︎